Connecting the ventilation unit to the computer
To use a computer as a second control in addition to the MyVallox Control control panel, connect the computer directly to the Vallox ventilation unit. To connect the ventilation unit to the MyVallox Cloud cloud service, see the instructions below.
Before starting, ensure that you have:
-
A computer with a browser that supports Web Sockets data transfer. Supported browsers are:
-
Firefox, version 31 or higher.
-
Internet Explorer, version 10 or higher.
-
Opera, version 25 or higher.
-
Chrome, version 31 or higher.
-
Safari, version 7 or higher.
-
The latest version of mobile device browsers.
-
-
The network connection to the Vallox ventilation unit either using a network cable (RJ-45) or a router.
Note
These instructions are for the Windows 7 operating system.
To setup the Vallox ventilation unit using the MyVallox Home/Cloud user interface:
-
Start the computer.
-
Connect one end of the network cable to the computer and the other to the grey network connector of the Vallox ventilation unit.
Note
The Vallox ventilation unit can also be connected to a router. This allows for connecting the Vallox ventilation unit to the MyVallox Cloud cloud service. Alternatively, the Vallox ventilation unit can be connected to the computer by WLAN.
-
Plug the Vallox ventilation unit into the mains.
Note
The first launch of the unit may take a while, as the control panel will format its software and verify that it has the latest software version.
-
Select, on your computer, Start → Computer → Network.
-
Wait a moment until a computer icon appears with the text
Valloxand a series of numbers. The ventilation unit is now connected to the computer.OR
Instead of points 4 and 5, the following steps can be taken:
-
From the MyVallox Control control panel, select Service menu → Diagnostics display → IP address.
-
Type in the IP address and press Enter.
Note
If no icon with the text
Valloxand a series of numbers appears, it is most likely that network sharing is enabled on your computer. Disable network sharing. -
-
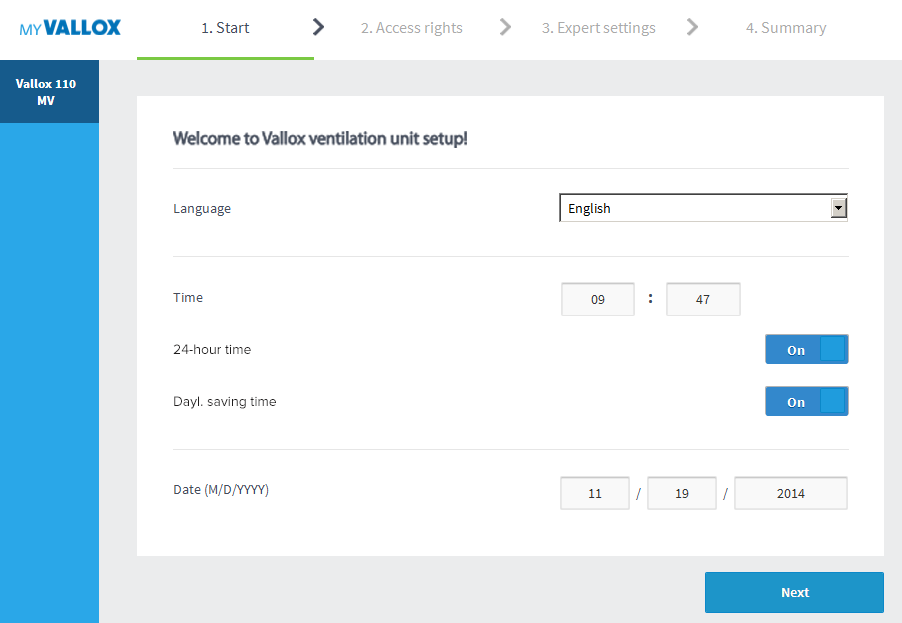
To start the setup wizard, double click on the icon.
The main page of the setup wizard opens in the default browser.