Cleaning the supply and extract air fans
Check the cleanliness of the fans when servicing the filters and the heat recovery cell. Clean the fans as required.
You can clean the fan blades with compressed air (wear protective goggles) or by brushing them gently.Do not remove or move the fan blade balancing weights.
To clean the fans:
- Disconnect the ventilation unit from the mains electricity supply.
- Open the door of the Vallox ventilation unit by undoing the finger screws.
-
Lift the door off.
CAUTION: The door is heavy.
-
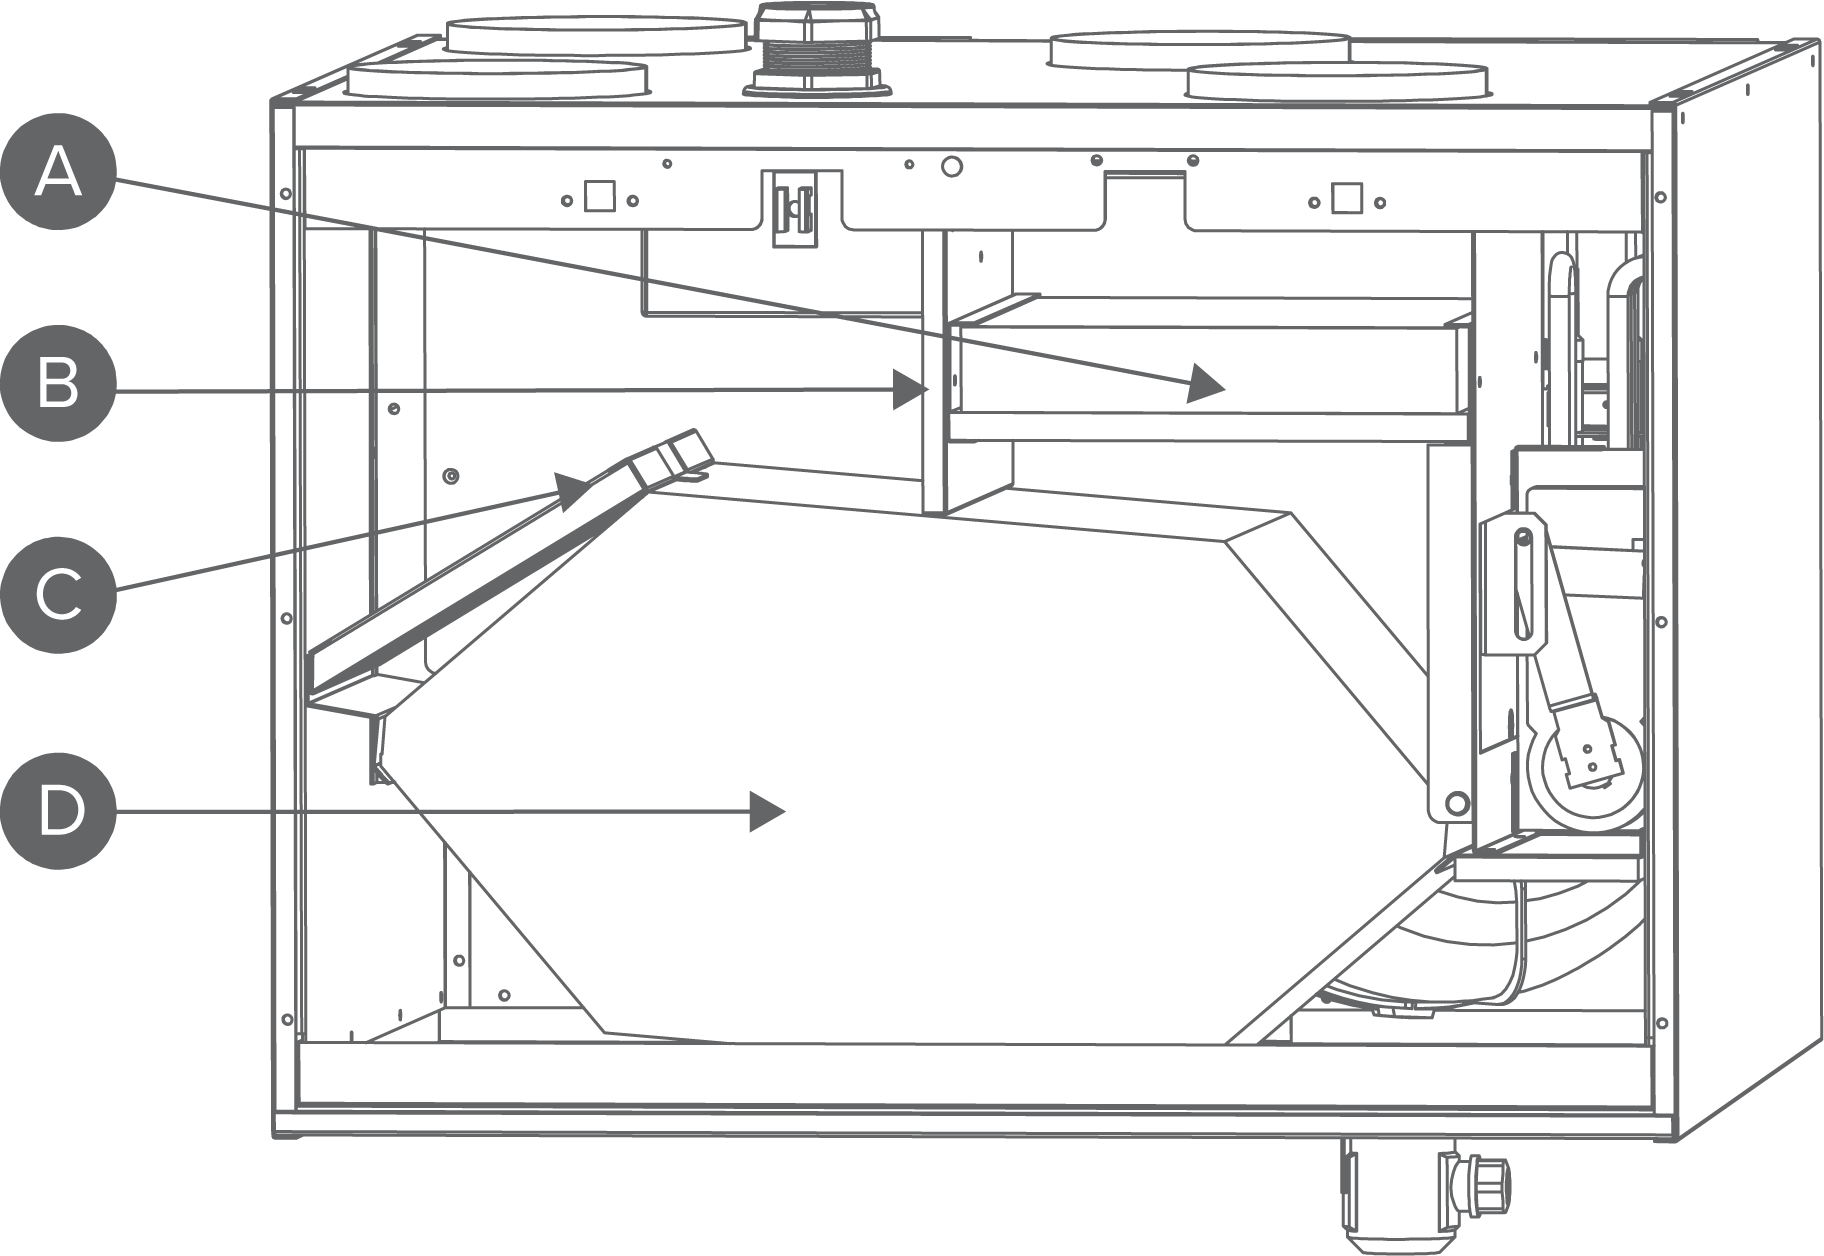
Remove the supply air filters (A) and the extract air filter and turn the upper support of the cell (B) anti-clockwise against the ceiling. See chapters Replacing the filters and Cleaning the heat recovery cell.

-
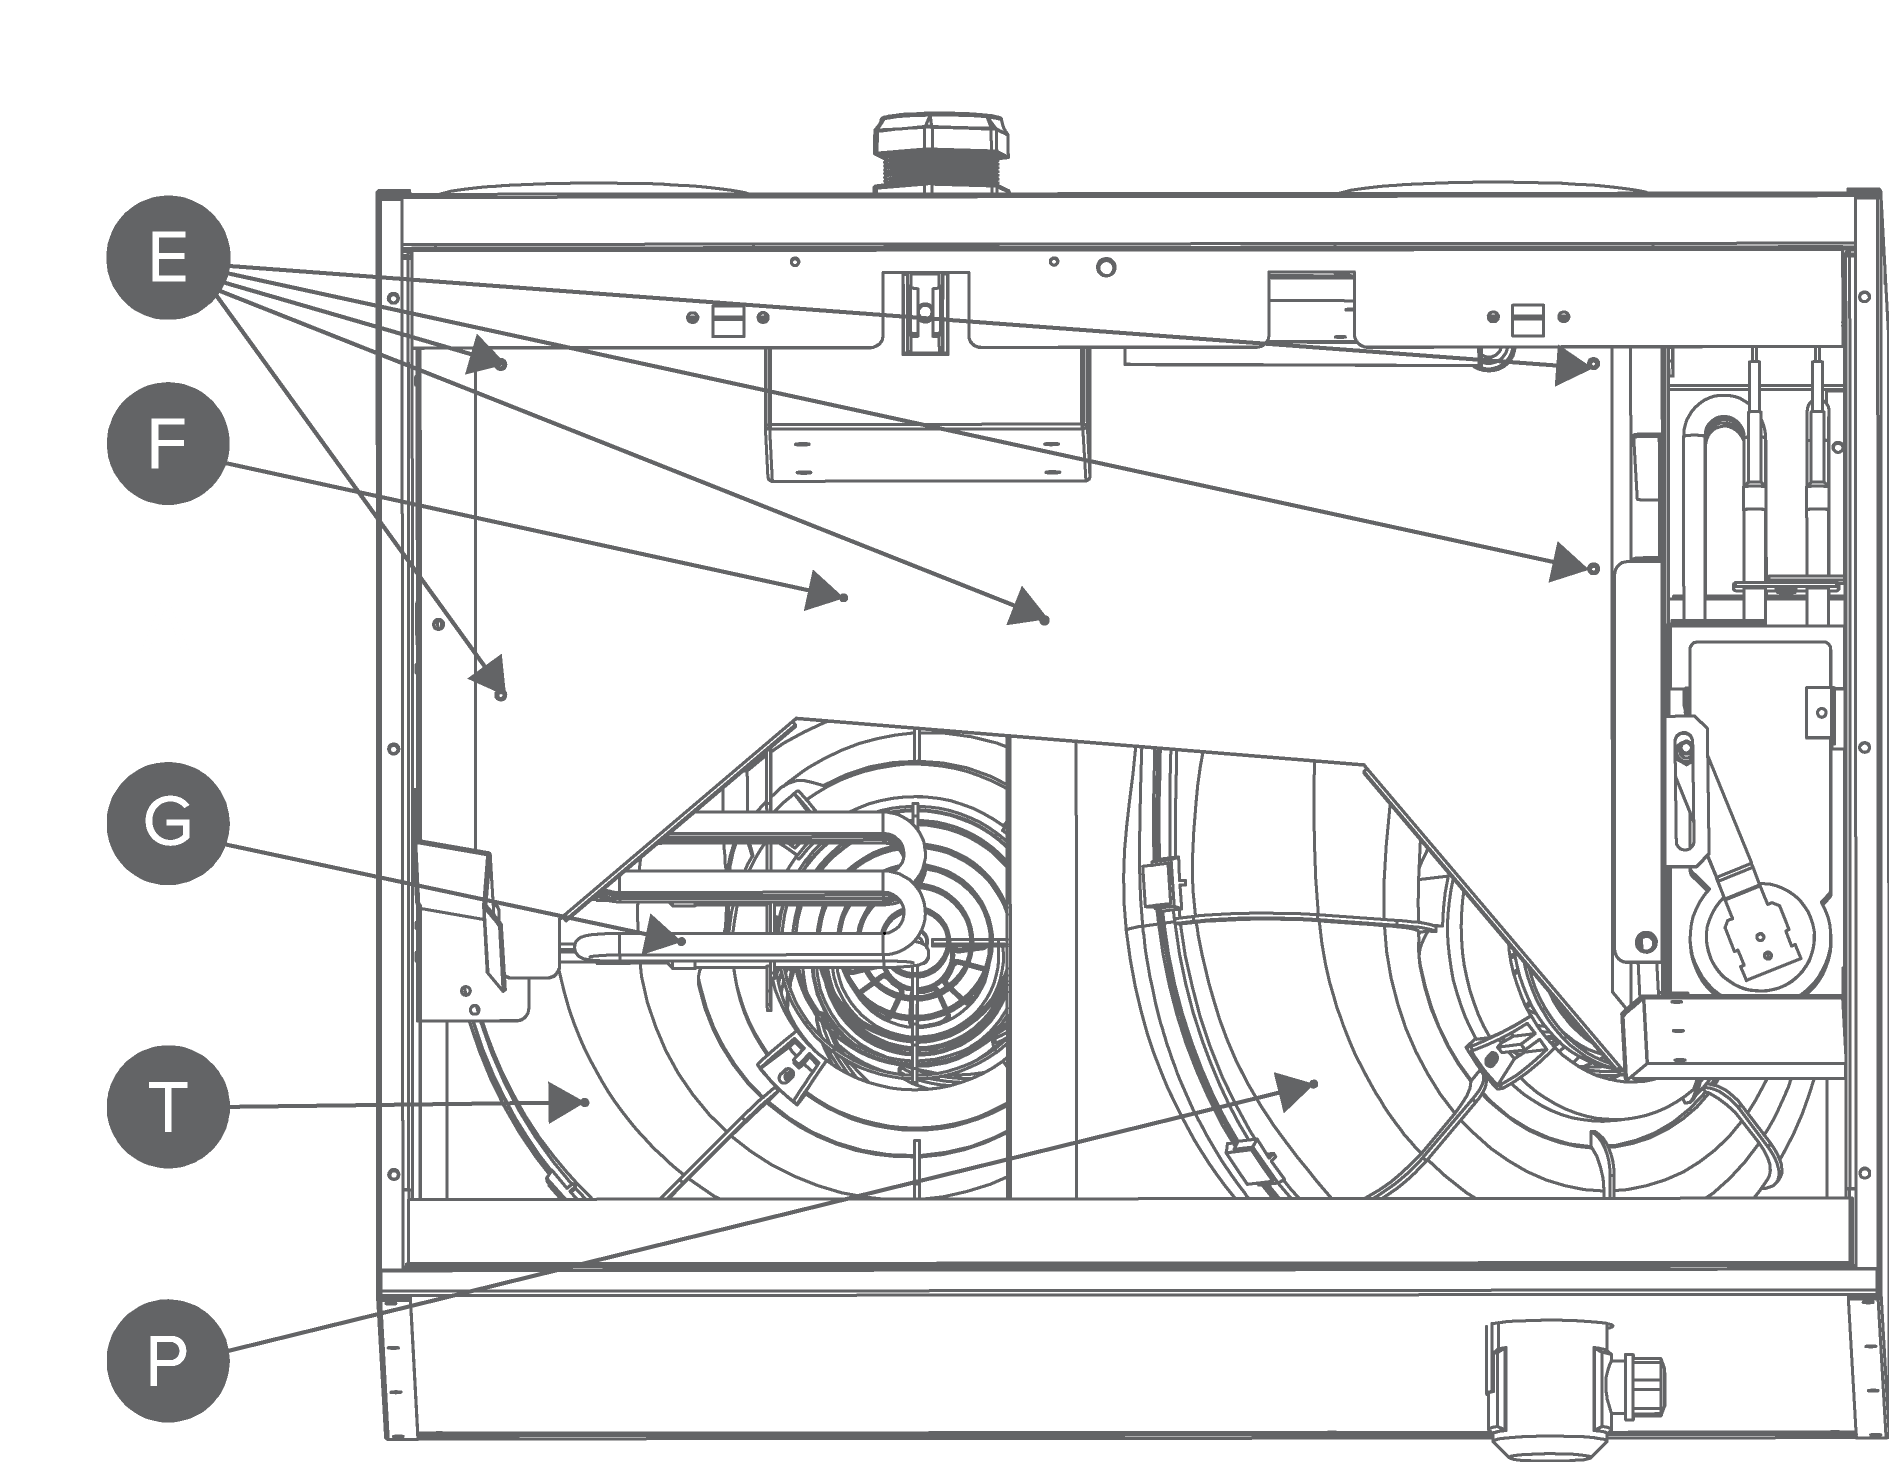
Remove the support plate (F) by undoing the screws (E).

- Push the wires of the fan and the rubber feedthrough (K/L) through the intermediate floor and to the bottom part of the unit.
-
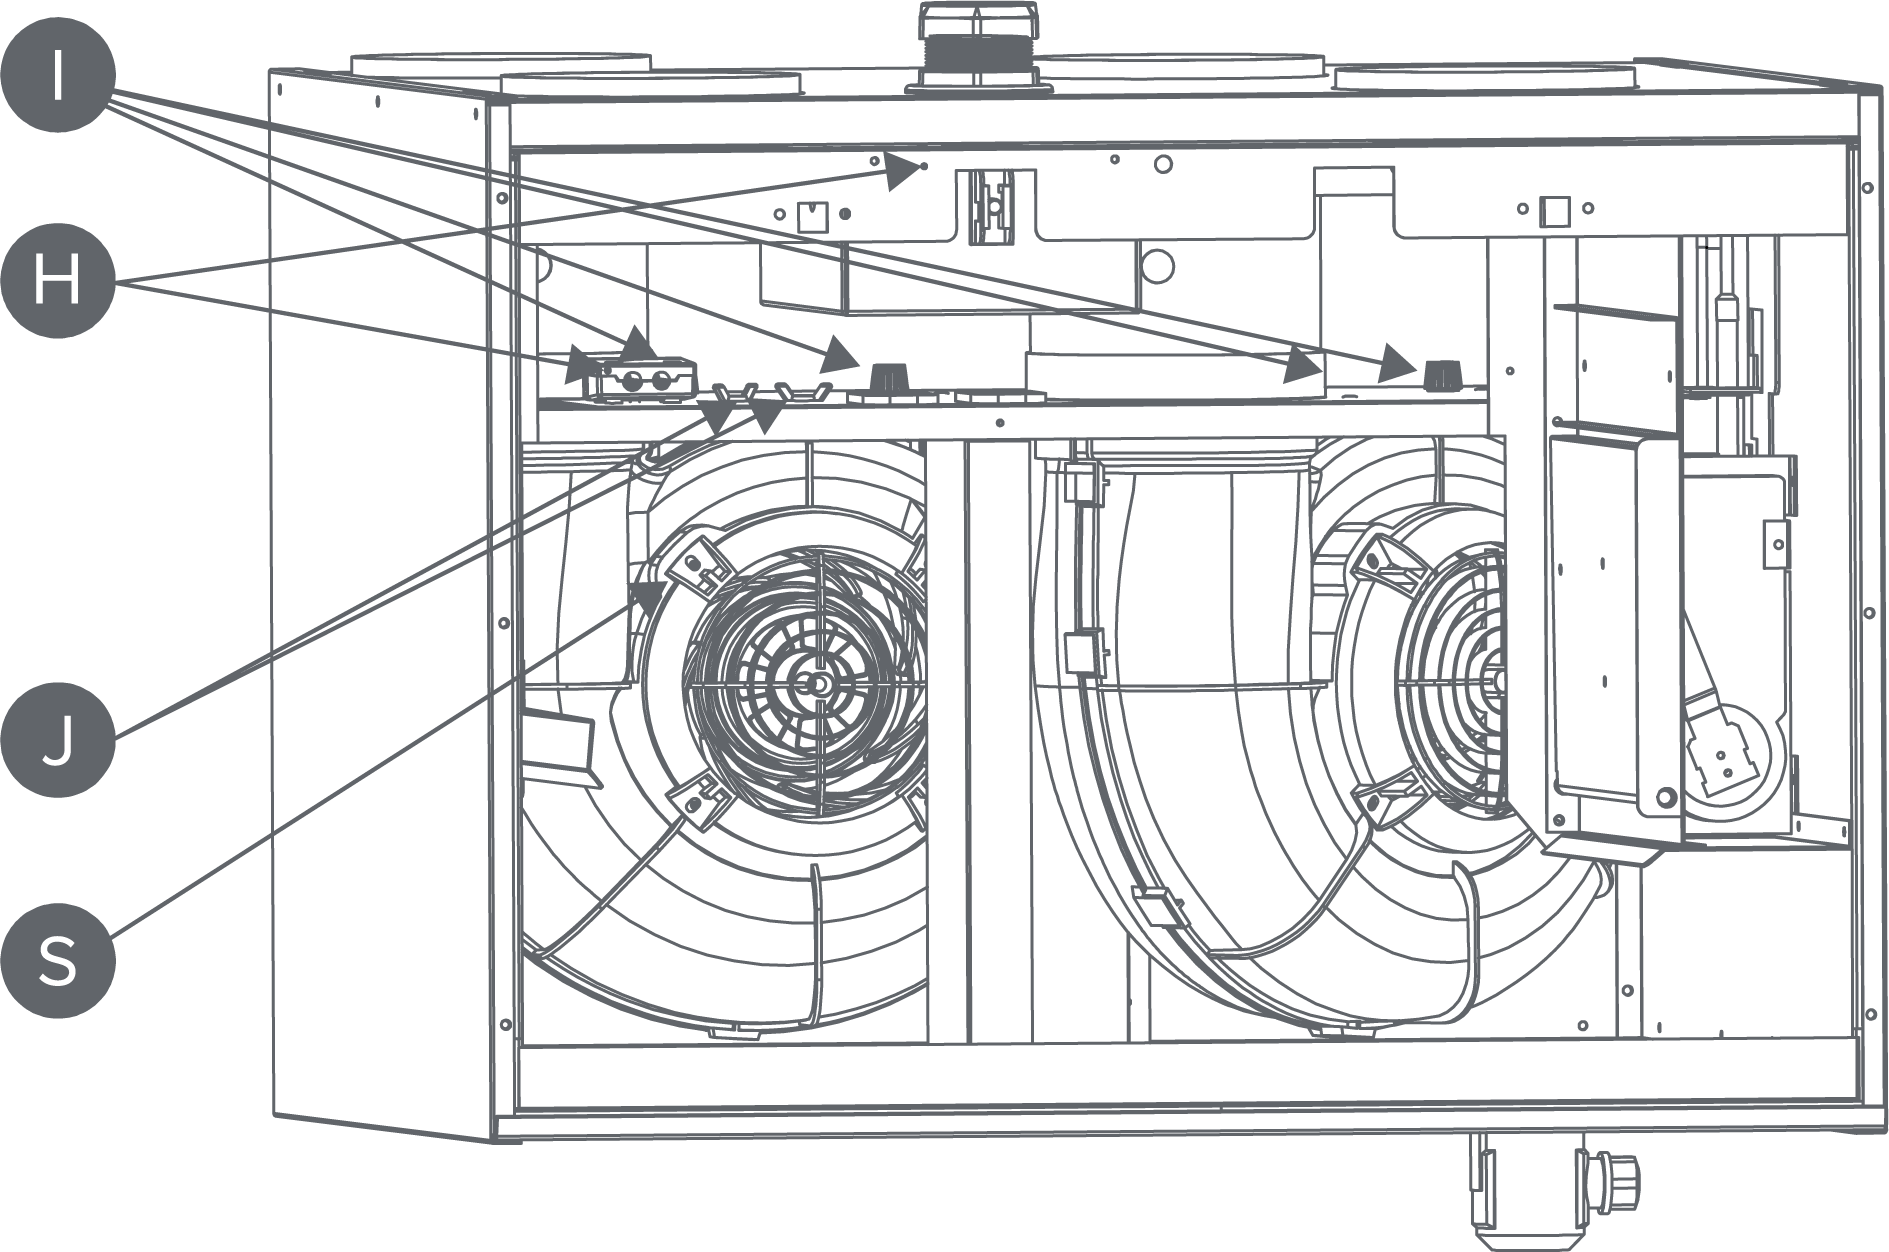
Remove the plastic screws used to fasten the fans (I) (2 per fan). Remove the wing screws (J) (2 pcs) of the post-heating resistor (G) (only when changing the supply air fan) and remove the cable of the resistor (G) from the connector.

- Remove the fan from the unit by lowering it before turning the fan anti-clockwise, whilst tilting it.
- Remove the control grille by undoing the screws (4 pcs).
- Clean the fan.
- Put the control grille (S) back in place after cleaning.
- Reassemble in reverse order after cleaning. Once the fan has been installed, ensure that the rubber feedthroughs (K, M, L) are in place.
- Close the door. Ensure that the safety switch catch of the door is touching the safety switch.
- Plug the ventilation unit back into the mains.
Note: If the power cord is damaged, the manufacturer, its service representative or other person with similar qualifications must replace it to avoid danger.
