Set the time and date
Tip
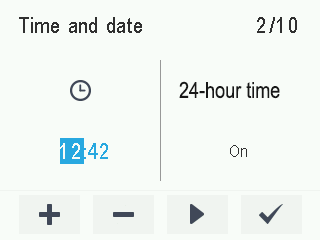
Use the Right arrow button to view the Time and date settings.
Set the time:
-
-
Use the Plus and Minus buttons to set the hours.
-
Select Right arrow.
-
Use the Plus and Minus buttons to set the minutes.
The time is now set.
-
Proceed to the next phase by selecting Right arrow.
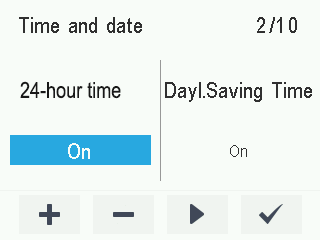
Set the 24- or 12-hour clock:
-
The 24-hour clock is used by default. To use the 24-hour clock, proceed to the next step by selecting Right arrow.
-
To turn on the 12-hour clock, select Minus. The 24 h setting value is changed to Off.
The 12-hour clock is now set.
-
Proceed to the next phase by selecting Right arrow.
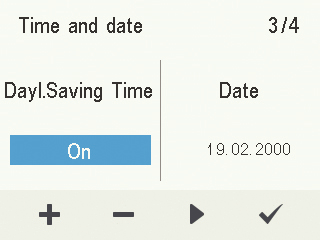
Set the automatic or manual daylight saving time:
-
By default, automatic daylight-saving time is turned on. To use the automatic daylight saving time, proceed directly to the next step by selecting Right arrow.
-
To use the manual daylight saving time, select Minus. The Daylight saving time setting value is changed to Off.
The manual daylight saving time setting is now on.
-
Proceed to the next phase by selecting Right arrow.
Set the date:
-
Date is set on the Date display.

Use the Plus and Minus buttons to set the date.
-
Select Right arrow.
-
Use the Plus and Minus buttons to set the month.
-
Select Right arrow.
-
Use the Plus and Minus buttons to set the year.
-
Select OK:

The date is now set.